
Changing terrain colours
Colour terrain by elevation with built-in or custom colour ramps, set the value range, use equal or custom class intervals, and read the legend.
You will learn
- Choose and reverse a colour ramp.
- Set an automatic or manual value range.
- Create equal classes or your own class breaks.
- Define a custom colour ramp.
Prerequisites
Data for this tutorial
Nanda Devi massif, SRTM (real terrain) Download nanda-devi-srtm-1arcsec.tif
- Format
- GeoTIFF, 1 band, Int16, Deflate, tiled
- CRS
- EPSG:4326 (WGS 84, longitude/latitude)
- Content
- Elevations 2285 to 7801 m above the EGM96 geoid; lon 79.7276 to 79.9776, lat 30.2279 to 30.4779
- In Orbis3D
- Data panel ▸ Sample data ▸ Nanda Devi massif, SRTM (real terrain) ▸ Load
- Licence
- SRTM 1 arc-second, NASA/USGS, public domain
Synthetic samples are CC0 1.0; the SRTM sample is public domain. About the datasets
The task
The default Terrain ramp runs from green lowlands to white peaks. For a report you want a hypsometric tint with clear elevation bands, and the legend to match.
Steps
- Load Nanda Devi massif. The Surface tab is open on the right.
- Under Colouring, open Colour ramp. Each ramp shows a preview. The groups are:
- Elevation: Terrain, Hypsometric tint, Alpine.
- Sequential: Viridis, Cividis (colour-blind safe), Magma, Greys, Slope.
- Diverging: Spectral, Blue–white–red (for differences around zero).
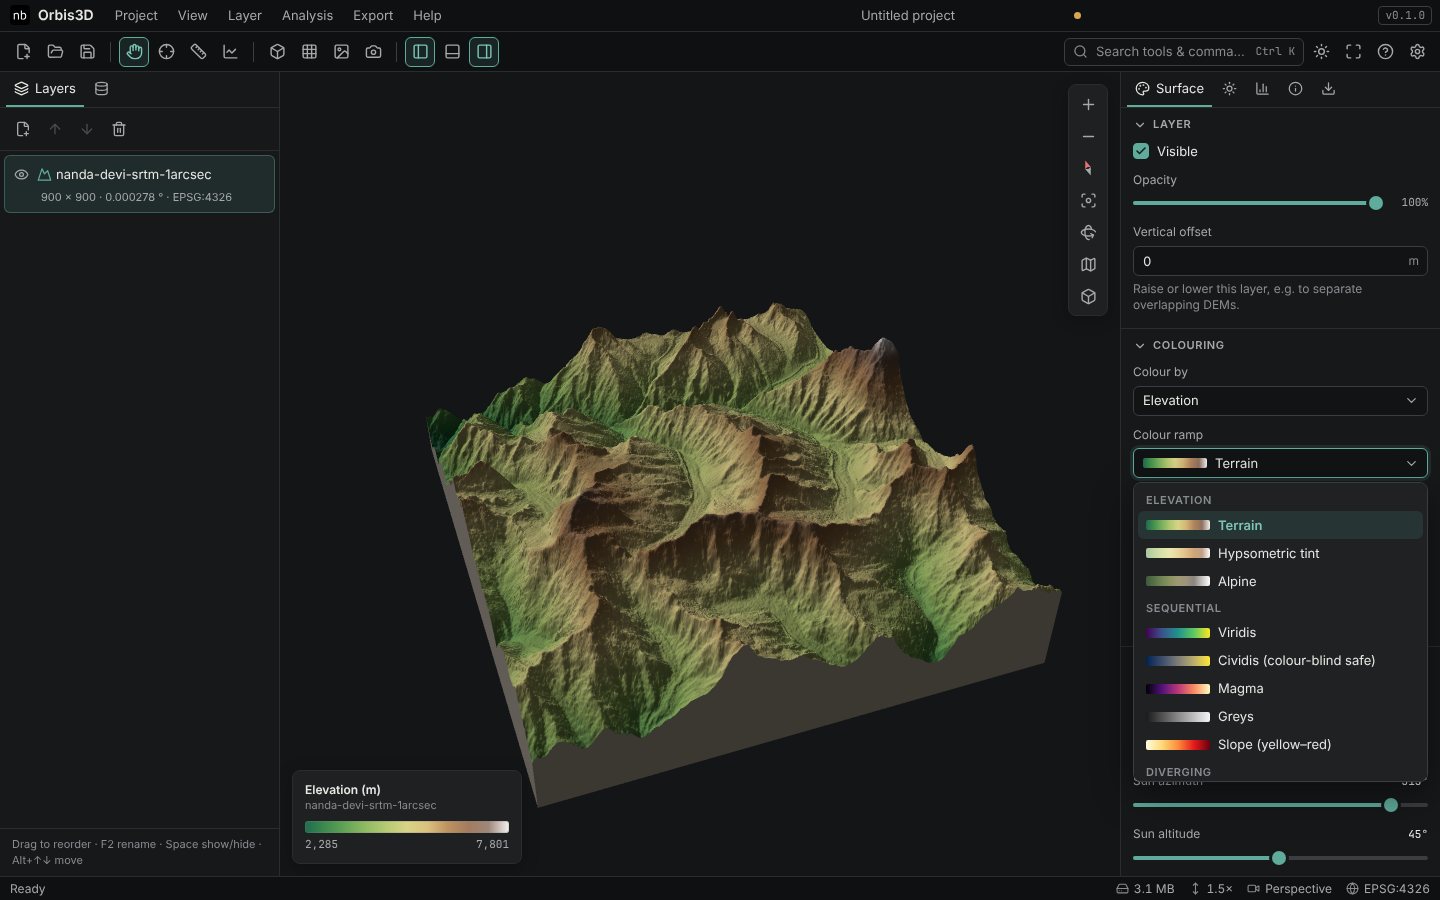
- Choose Hypsometric tint.
- Under Value range, choose:
- Min – max: the full range of the data (2,285 to 7,801 m here);
- 2 – 98 %: ignores the lowest and highest 2 % of cells, for more contrast when a few extreme cells stretch the range;
- Manual: type a Minimum and Maximum. Values outside get the end colours.
- Under Classes, choose 8 equal intervals. The ramp is cut into eight bands and the legend lists their ranges.
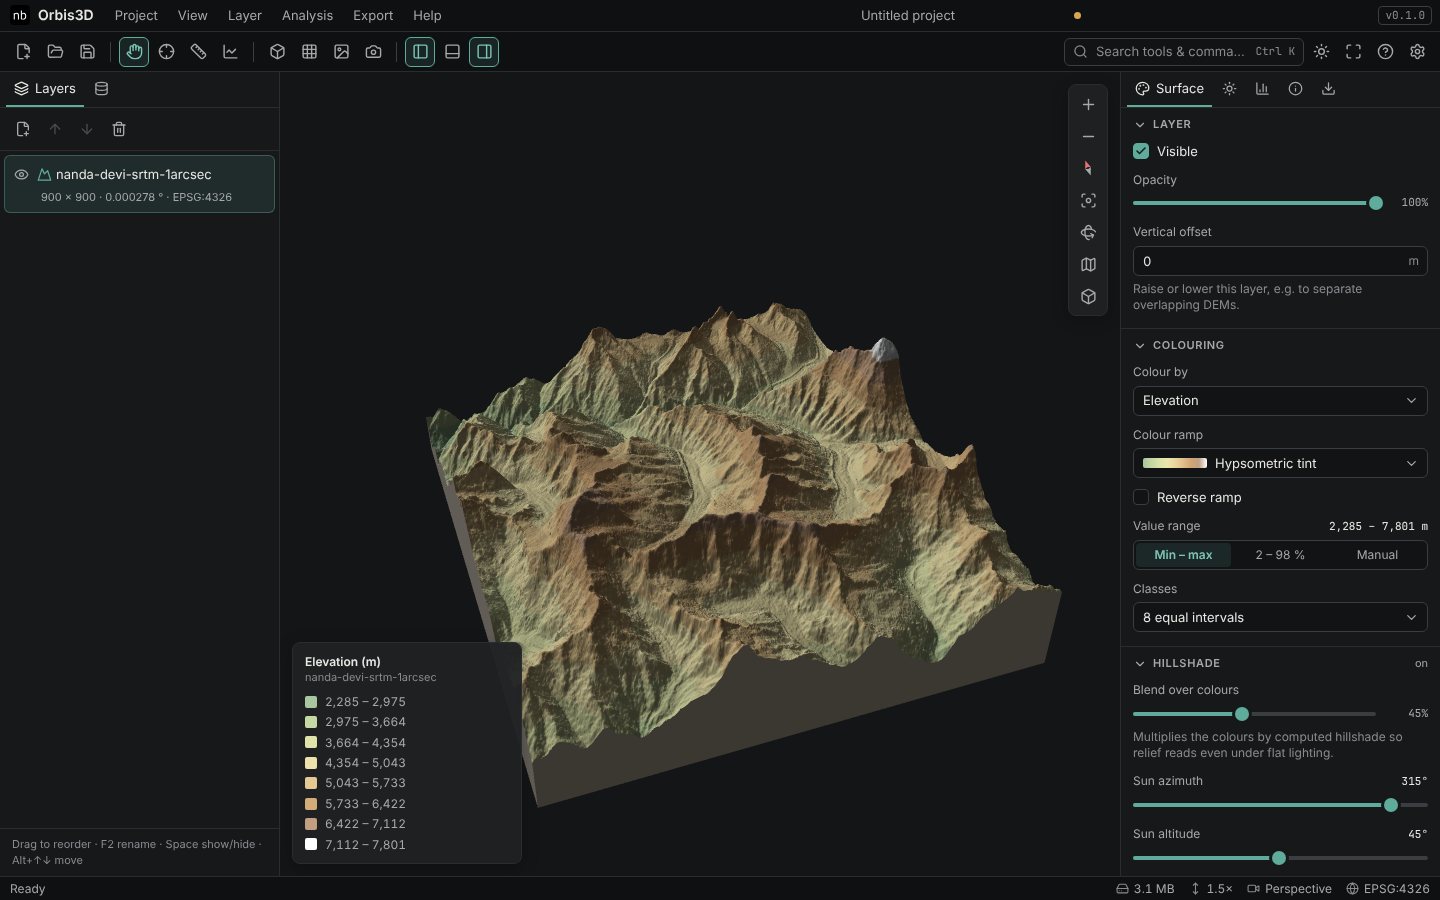
- For your own intervals, choose Custom intervals… and type the class breaks in Class breaks, separated by commas, for example
2000, 3000, 4000, 5000, 6000, 8000. That makes five classes. - For your own colours, choose Custom colours at the end of the ramp list. Edit each colour swatch (low to high), add up to eight colours with Add, and remove colours with the cross.
- Tick Reverse ramp to swap the order of any ramp.
The hillshade blend
The colours are multiplied by a computed hillshade so that relief reads even in flat light. Change the strength with Surface ▸ Hillshade ▸ Blend over colours (45 % by default; Off at 0). See Generating hillshade.
## Expected resultThe terrain shows eight hypsometric bands of about 690 m each, and the legend lists them from 2,285 to 7,801 m.
Common mistakes
- Breaks with only one value. Custom intervals need at least two numbers; the box is marked invalid otherwise.
- Choosing Blue–white–red for elevation. Diverging ramps are for data centred on zero, such as elevation differences.